How to Make Your Own Painted Chocolate Bunny Pops for Easter
Have you ever been shopping and seen those cute chocolate pops with the painted colors and wondered, “How did they do that?” Or maybe you’ve been to your local craft store and seen the candy molds and thought, “I could do that!” Well, we are here to tell you it is not as hard as it seems!
With Easter upon us, it’s a good time to try this technique. As we all know, there are few things cuter than a chocolate bunny. We’ll walk you through step-by-step how to create your own homemade molded chocolate or candy pops to wow your kids or the local PTA bake sale.
First, you need to gather your supplies. Nothing like starting a project to find yourself missing a critical tool, having to stop, and start again at a later date. Not that we would know anything about that…
You need:
- A plastic mold of your choice (check your local big box craft store or candylandcrafts.com )
- Colored Candy Melts (find them here at your local craft store or candylandcrafts.com ) OR White Chocolate Wafers and Oil-Based Food Colors (wilton.com or candylandcrafts.com )
- Clean paintbrush (never used for paint)
- Chocolate of your choice to fill the painted mold (get ours by calling 1.877.CHOCLIT)
- Funnel with control rod (kitchenkrafts.com )
- Ladle
- Microwave-safe containers
- Silicone spatula for stirring
- Lollipop sticks if using a pop mold (kitchenkrafts.com )
- Clean sharp knife for trimming
- Cello bags and ties for packaging (kitchenkrafts.com )
Make sure all your tools are clean and dry! Water is the enemy of chocolate! There is a video showing the process at the bottom of this post as well.
Step One:
Choose the color you want to start with and melt a small amount of the candy melts in a microwave-safe container. Just follow the package directions. We are re-melting ours. That is why it is in a handy bowl-shaped chunk, but you get the idea!
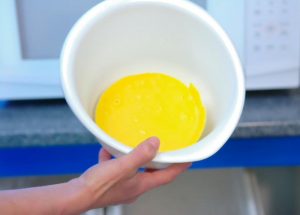
Make sure you use a container proportionate in size to the number of candy wafers you are melting. Leave room to stir! A good rule of thumb for the candy melts if you misplaced the melting directions or there wasn’t any is to start with 30 seconds. Stir, then continue in 10-second increments stirring in between until melted. Add a few solid wafers and stir to incorporate until smooth.
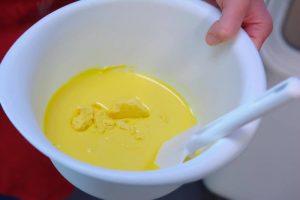
We are using a fancy-dancy infrared thermometer to see if our chocolate is in TEMPER because, well, we’re professionals. Don’t be jealous, get your own! Check amazon.com for a variety of choices. If you use real white chocolate wafers, you will want to melt in the same manner as candy melts. Then, add your oil-based color one drop at a time until you achieve the color you like.

Step Two:
Begin to paint your melted color into the mold in the spot you want. Try to cover the mold so that you can’t see your counter through the color you’re painting but don’t FILL the mold with the candy melts, you want to save room for the chocolate!
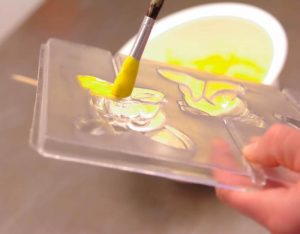
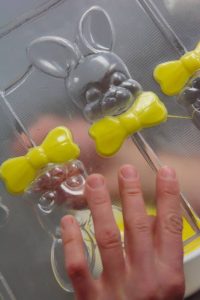
When you’re satisfied repeat steps one and two until you have used the colors you want. Don’t be afraid to leave some area unpainted so that the chocolate shows through! We are only doing a painted yellow bow today and leaving the rest of these bunnies to be chocolate.
Step Three:
Time to fill your molds! In a clean bowl not used for the candy melts put in your real chocolate pieces. Start your microwave at 45 seconds, stir, and continue in 10-second intervals until you have almost completely melted the chocolate. Add a small number of solid chocolate pieces and stir until melted and smooth. Ladle the melted chocolate into the funnel. Make sure the hole is blocked with your finger or another tool.
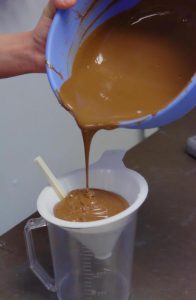
Hold the funnel over one mold and unplug the hole allowing the chocolate to flow out. Your goal is to have an evenly full mold.
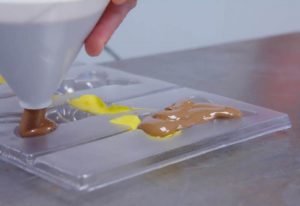
You can level out with a silicone spatula if needed. Also, since we are making Chocolate Pops, we are using our stick to help spread the milk chocolate into all of the nooks and crannies in the mold.
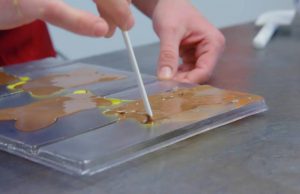
If using a pop mold you will want to add your lollipop stick now in the indentation. Leave enough stick so kids can hold the pop, but insert in chocolate far enough so it will have a good grip on the pop. Roll the stick in the indentation so that it will be completely covered in chocolate and sink into the pop a little more.
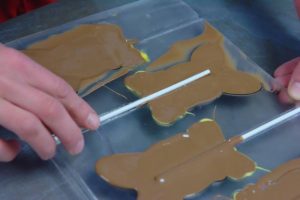
The last step before cooling off the pops is to make sure there are no air bubbles showing. Carefully lift your mold, and check the underside to see if you missed filling the chocolate into any spots. If there are any air bubbles, just use your stick to move some chocolate to the missing area.
Step Four:
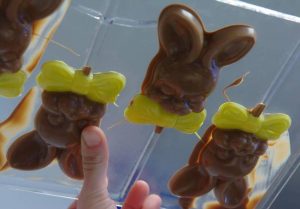
Allow the molds to cool in your fridge, checking every 10 minutes or so. When cooled turn mold over so the painted side is up.

Gently and slowly wiggle the mold to release any stubborn chocolates. With any luck, all your molds will release with ease!
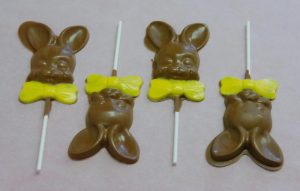
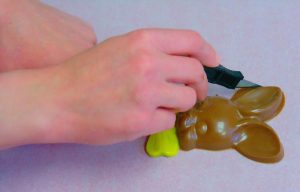
If you have a particularly messy mold you can trim the spilled part off with a clean utility knife.
Wrap in a little cello bag tied with a twist tie or ribbon and you are finished! Look at these beauties! No one will believe you created these divine confections yourself.
