How to Temper Chocolate at Home
Watch Your Temper
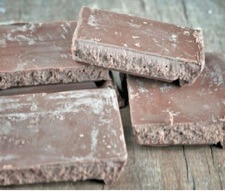 One of the basics of chocolate handling is a little process called Tempering. Thanks to those good folks churning out bags of chocolate pieces you can get at the grocery store most of us think we can throw some chocolate in the microwave to melt and call it a day.
However, have you ever been working with melted chocolate, making some chocolate-covered cookies for example, or pretzels and the chocolate looked cloudy or turned white when it cooled? Aha! Your chocolate was not in temper! Fear not, those cloudy morsels are still edible. The chocolate is not “old.” The white color comes from cocoa butter crystals.
So, how do we prevent the dreaded cloud?
How do we get divinely shiny, nay glistening, chocolate? Temper, baby, temper! What IS tempering? In short. Because there is a long version, but we’ll let the scientists deal with that.
When you melt chocolate, you take the cocoa butter crystals in the chocolate from solid to a liquid state. When the chocolate cools the crystals are forming again, back into solid form, and HOW that happens results in varying types of crystal shapes.
To get the best crystal formation for a chocolate with a good “snap” and sheen you want to melt your chocolate at the correct temperature (about 90°F for milk chocolate) and stir or agitate while adding solid cocoa crystals into the already melted crystals. Voila! Tempering. Yay! You learned something new today!
Think you’re ready to give it a whirl? Try these easy steps.
Once your chocolate is tempered, you can use it to coat your favorite treats (cookies, pretzel rods, more chocolate). You can add some of your favorite mix-ins (nuts, dried fruit, toffee pieces) and spread them onto a parchment-lined baking sheet for your own custom Chocolate Bark! People will think you’re amazing. Whatever you decided to do with your tempered chocolate remember to have fun and enjoy!
How To Temper Chocolate
Equipment Needed:
- ½ lb. chocolate (we are using Milk Chocolate today)
- Sharp knife for chopping
- Microwave safe bowl
- Silicone spatula for mixing
Step One:
Cut your chocolate into manageable pieces if working from a large block. If your chocolate is already in pieces-congrats! Just saved yourself some elbow grease. For this illustration, we’re using Milk Chocolate. You can get ours by calling 1.877.CHOCOLIT.
Step Two:
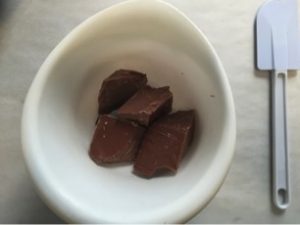
Place your chocolate pieces into a microwave-safe bowl, reserving about a ¼ cup for later, and microwave on high for 60 seconds
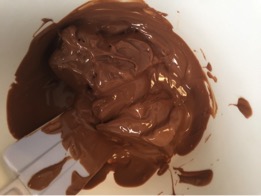
Stir your chocolate, there will still be mostly chunks and the beginning of melted chocolate.
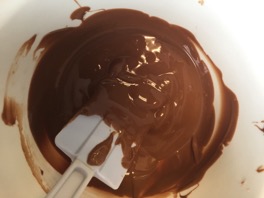
Place in the microwave again, this time for 15 seconds on high. When you remove the bowl this time and stir it should be almost nearly melted with only a few small lumps the size of beans. If you are NOT at this stage, then microwave one last time for 10 seconds. *
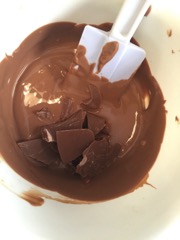
Step Three:
When you reached the very nearly completely melted stage, add in your reserved scant ¼ cup of chocolate. Stir those pieces in until they melt and the chocolate is smooth. About 30 seconds to one minute, so get your arm muscles ready.
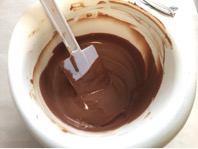
At this point, if there are a few bean-sized chunks left you can fish them out with a fork so they don’t get on your project. You may also have perfectly smooth chocolate, either way, is fine! If you have stirred your chocolate for at least 30 seconds to a minute with your solid cocoa butter crystal addition, you are most likely at 90°F. That means you have tempered chocolate! For white chocolate, 86°-88°F is ideal.
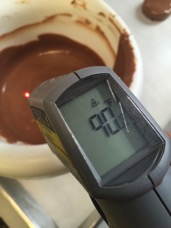
Want to make double sure?
Get yourself one of these infrared temperature guns we’ve talked about before and look cool.
Want to make sure you’re in temp, but secure with your current level of awesomeness?
Just use a regular probe thermometer. Now that you have this delicious tempered chocolate, what will you create? Stay tuned to our blog for instructions on Chocolate Covered Oreos. Pass the milk!
*It’s important to note that time intervals vary depending on the quantity of chocolate you are trying to melt, the type of chocolate (dark, milk, or white), and the wattage of your microwave. I wouldn’t melt more than one pound at a time. Chances are by the time you are done with your project the last of that one pound of chocolate will be no longer in temp.
As a general rule, dark chocolate takes a little more time. There are fewer cocoa butter crystals. White chocolate may take less time because there are more cocoa butter crystals. Don’t microwave for intervals longer than 30 seconds after the first one. You run the risk of heating your chocolate to too high of a temp, or even burning it.
**Want to temper, but don’t have a microwave?
Bring on the double boiler! Complete step one and also reserve a scant ¼ cup of your chocolate to the side. In a glass bowl set over simmering water, place your chopped chocolate and stir constantly until almost completely melted. DO NOT LET THE WATER TOUCH THE BOTTOM OF THE BOWL!
Remove the bowl from the saucepan and add your reserved chocolate. Stir for 30 seconds to one minute until fully melted and smooth or very few small chunks remain.


